Electric fans are a lifesaver during hot days, but over time, they collect layers of dust that can impact performance and even blow harmful particles into the air. Cleaning your fan may seem like a chore, especially if you think it requires disassembling the frame and blades. But what if I told you there’s a quick, hassle-free way to clean your fan without taking it apart? With this simple plastic bag trick, you’ll have your fan spotless in no time—no screwdrivers required.
Why You Should Clean Your Fan Regularly

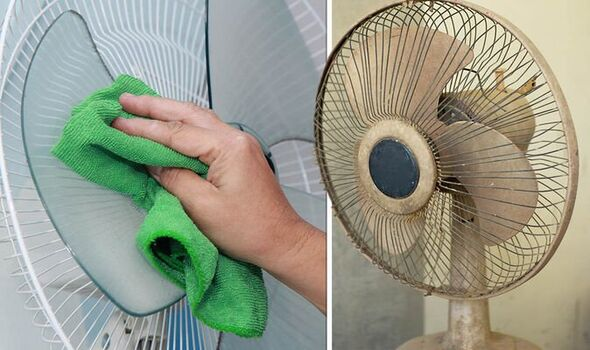
Before jumping into the cleaning method, it’s important to understand why regular fan maintenance matters. Dust buildup on fan blades and frames doesn’t just reduce airflow efficiency—it can also blow allergens and harmful particles into the air, posing health risks.
Breathing in dust-filled air can exacerbate allergies, trigger respiratory issues, and reduce indoor air quality. Plus, a dusty fan motor has to work harder, which can lead to overheating and reduced lifespan. Regular cleaning ensures your fan works efficiently, lasts longer, and promotes a healthier environment.
The Easy Way to Clean a Fan Without Taking It Apart
No tools? No problem. This simple six-step cleaning hack uses household items you probably already have, saving you both time and effort.
Step 1: Prepare a Cleaning Solution
Start by mixing one tablespoon of detergent with water in a small bowl. Stir until the detergent dissolves completely, then pour the mixture into a spray bottle.
Why detergent? It breaks down grease and grime that may have built up on the fan blades and frame.
Step 2: Create a Vinegar and Fabric Softener Mix
In a second spray bottle, combine equal parts fabric softener and white vinegar. Shake the bottle well to mix the two ingredients.
The vinegar acts as a natural cleaner and disinfectant, while the fabric softener helps loosen stubborn dust and prevents static cling, making it harder for dust to settle on the blades again.
Step 3: Spray the Blades with the Vinegar Solution
Turn off and unplug the fan for safety before proceeding. Spray the vinegar and fabric softener solution directly onto the fan blades. Be generous—make sure all surfaces are coated.
Let the solution sit for 3–5 minutes to soften and loosen the dust. This step makes it easier for the dust to be blown off in the next stage.
Step 4: Use a Plastic Bag to Trap Dust

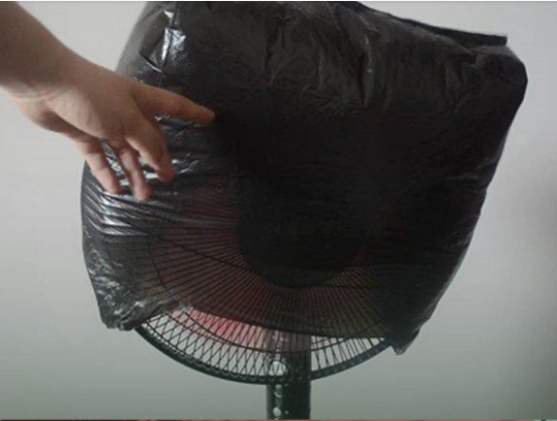
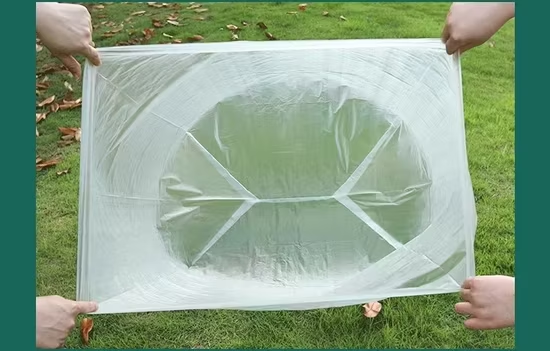
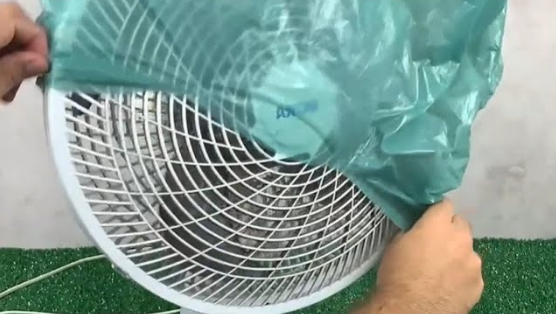
Here’s the magic step! Take a large plastic bag (a garbage bag works well) and carefully cover the entire fan, including the blades and frame. Secure the open end of the bag around the base of the fan to ensure no dust escapes.
Turn the fan on at its lowest setting and let it run for 2–3 minutes. The air circulation inside the bag will blow the loosened dust off the blades, trapping it inside the bag.
Pro Tip: Place a basin or tarp under the fan to catch any dust that might escape or do this step outdoors for easier cleanup.
Repeat this process two to three times, or until the blades are visibly clean.
Step 5: Clean the Frame and Grille
Now that the blades are clean, it’s time to tackle the fan’s frame and grille. Use the detergent solution from Step 1 and spray it generously onto the frame and outer surfaces.
Grab a soft cloth or a small brush (like a toothbrush) and gently scrub away any remaining dust or grime. The detergent should make this process quick and effortless.
Step 6: Wipe Everything Down

Finally, take a clean, damp cloth and wipe down the entire fan, including the blades, frame, and base. Make sure to remove any lingering cleaning solution or dust particles.
If you used the fan outdoors for the plastic bag step, bring it back inside and give it one final wipe to remove any outdoor debris.
Once dry, plug the fan back in, and voilà—you’ve got a clean, dust-free electric fan without the headache of taking it apart.
Benefits of This Method
- Time-Saving: No need to disassemble and reassemble the fan.
- Hassle-Free: Cleaning with a plastic bag reduces mess and effort.
- Environmentally Friendly: Uses household items instead of chemical cleaners.
- Improves Health: Removes dust and allergens, improving indoor air quality.
Tips to Keep Your Fan Cleaner for Longer

To minimize future cleaning sessions, follow these simple tips:
- Dust Weekly: Use a microfiber cloth or duster to wipe down the blades and frame regularly. This prevents heavy buildup over time.
- Position the Fan Strategically: Avoid placing the fan near open windows or doors, where it can suck in dirt and pollen from outside.
- Use an Air Purifier: Pairing your fan with an air purifier can reduce the amount of dust circulating in your home.
- Cover the Fan When Not in Use: A simple cloth cover can prevent dust from settling on the blades when the fan is off.
Conclusion: A Cleaner Fan in Minutes
Cleaning an electric fan doesn’t have to be a time-consuming or frustrating chore. With this simple plastic bag hack, you can quickly remove dust from your fan without the hassle of taking it apart. Not only does this method save time, but it also ensures better air quality and extends the lifespan of your appliance.
By following the six easy steps outlined above, you can keep your fan running smoothly and your indoor air fresh and healthy. So the next time you notice your fan looking a little dusty, skip the screwdriver and reach for a plastic bag—you’ll be amazed at how effective this trick can be!


